
Selling tickets online takes an evening the first time and about twenty minutes every time after. This is the whole path on tickts, in the order you will actually do it, with the decisions flagged where they matter and the things you can safely leave for later marked as such.
Before you start: four things to have ready
- The date, the venue and the doors time. The venue needs a postcode, because it becomes a map on your page.
- Your ticket prices and how many of each. Two or three types is plenty. See the guide to ticket types and pricing tiers if you want early bird pricing.
- An image. Your poster, or a good photo. Any shape works; if you have nothing, tickts builds a branded card from your event details so the page is never bare.
- Your bank details, for the payment set-up. You can build the whole event before this step.
Step 1: the account
Register at tickts.co.uk. A new account starts as a fan account, which is for buying tickets; to sell, choose Upgrade to Organiser in Settings, or follow the organiser link on the register page. Pick the organiser mode that fits: Event Organiser for most people, Club for football, rugby, cricket, wrestling or boxing (it adds fixtures, opponents and season passes), Venue if you sell for your own space, or Festival for day passes and weekend bundles. You can change mode later and existing events keep working. It is free and there is no card to enter.
Step 2: build the event
The create page runs top to bottom: the basics, the format, the dates and tickets, the images, then a set of advanced options most events never need. Save it as a draft at any point; drafts are private, and you can come back as often as you like.
- Title and description. Write the description for someone who has never heard of you. The first two sentences are what social previews show.
- Dates. One date, or as many as the run has. Each date carries its own tickets and its own doors time.
- Venue. Add it once and it is saved for next time. A venue made from a postcode gets a map and directions on the page automatically.
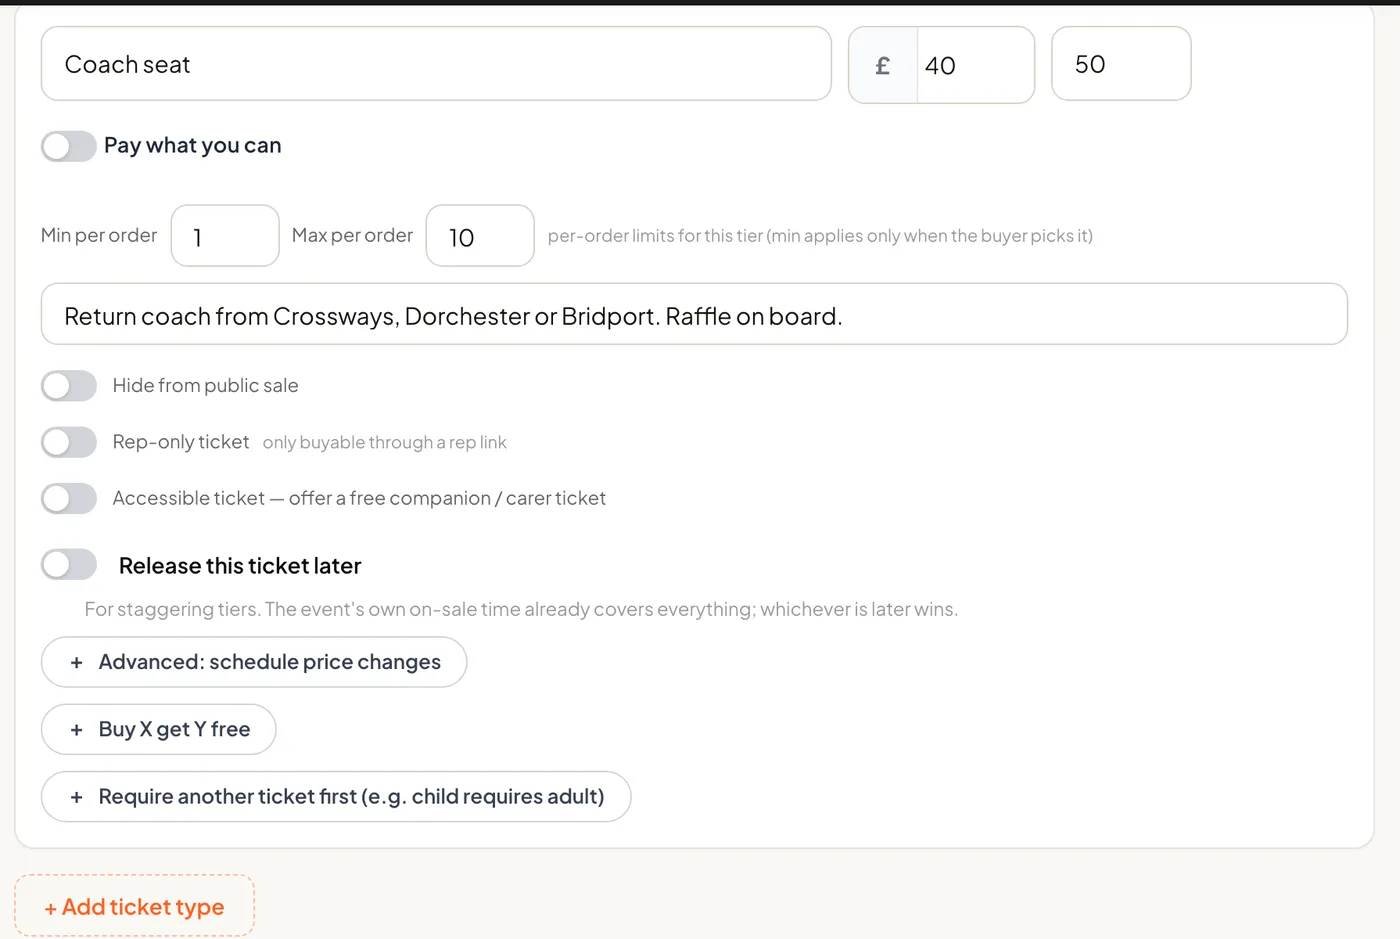
- Tickets. Name, price, capacity, and any limits per order. Price a type at £0 for free tickets.
- Payment. Card payments online is the default and takes the money into your own Stripe or PayPal account. The alternative, collecting payment yourself, lets buyers reserve online and pay you directly, with no fee at all.
- Fee mode. Absorb the card processing fee, 1.5% plus 20p on a UK card, or pass it on and let the buyer see it at checkout. Absorb is the default.
Step 3: connect a way to get paid
Paid events cannot go on sale until you have connected Stripe or PayPal, and the publish button will tell you so. Stripe takes about five minutes: business details, an ID check and a bank account. When a fan buys, the money goes into your own Stripe balance, not into a platform account that pays you later, and payouts to your bank run on Stripe's schedule. PayPal takes a couple of minutes from Settings and settles into your PayPal account. Free events skip this step entirely.
Step 4: publish and share
Press Publish and the page is live at its own address. Share the link wherever your audience already is; there is no marketplace to be found in and nothing to be buried under. Buyers do not need an account: they enter an email, confirm a six-digit code and pay. Their tickets arrive as a PDF in the confirmation email and as Apple Wallet and Google Wallet passes on the ticket page.
Publish in link-only mode, under Advanced options, and the page is live for anyone with the link but absent from listings and search. Run a test purchase, then switch it to listed when you are ready to promote.
Step 5: the night
Open the scanner on your phone, or send your door team a link from the Team page so they can scan without your password. Green admits, amber has already been scanned, red is not valid here. Print the door list before you leave as a backup. Walk-ups go through the Box Office tab, as cash, card on a connected reader, or a comp, and count against capacity like every other sale.
Step 6: afterwards
Sales shows every order with its payment method, ready to reconcile against the float. Refunds run from the order and go back through the card. The scan log tells you how many came and when. And the next event starts from Clone on this one, with the venue, the tickets and the settings already in place, which is the twenty-minute version.
Things you can leave for later
- Early bird pricing, group discounts and promo codes.
- An optional donation at checkout, with Gift Aid if you are a registered charity.
- A waitlist for when a date sells out, which on Growth and above re-offers freed seats automatically.
- Payment plans for higher-priced tickets, on Growth and above.
- Your own branding, and on Pro your own subdomain with tickts' name removed.
None of them are needed to sell your first ticket. All of them are there when you want them.
